Monday 18 March 2013

Mascot Competition

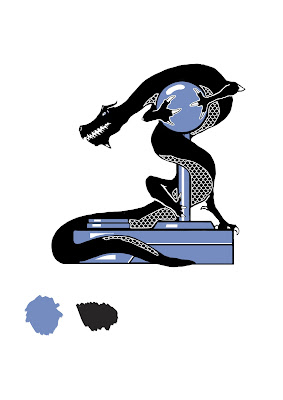
We were given the opportunity to do a competition brief for the gamesrepublic mascot, each year they choose a new design to be their mascot and we had to do our best to make a design that they might like.

Since this was a new experience for me trying to work to a brief with a limited description I found it quite a challenge, the reason for this is I have never tried this type of art before and found it to be quite tedious and annoying, trying to keep things as perfect and neat as possible isnt really my thing as I like to make mistakes and have rough edges but have them add to the composition not take away from it.

But yeah it was good that it was a new experience and if I ever try this type of work again I will know that there are certain pitfalls I need to avoid to create a nice piece of work in this style.


Thursday 14 March 2013

PPP Tutorial Presentation Day

This post consists of some of the work I have done of the 2 years I have been in DFGA and that I think is portpholio worthy, I have tried to mix up the content a little bit by including a few speed painting videos, a few filmmaking videos which are final pieces for filmmaking and visual effects modules, a few pictures that I think show my skills in digital artwork and painting and finally a process modelling video which shows how I have created a few assets in Maya. Anyway this page is basically for showing off a few of my favourite things that I have created over the last 2 years.


Thursday 7 March 2013

Uploaded 1 Min Video Finished

Finished

This is the finished version of my video, the only things I would have liked to have included but that I didnt have time to do were the initial title sequence which I even made space for at the start of this video but didnt include, and the end credits which I dont really see the point in doing as it was all me that created this video.


Almost finished

A cut of the video at a point a week before the finished version, this was used to present a crit with.


Template video

An old version of the finished video that I used for reference throughout modelling in maya and the rest of the module.

Wednesday 6 March 2013

AE Last Lesson Notes

These are the notes from the very last notes I took from the AE lesson we had on doing render passes, I didnt use render passes in the end result of my piece because I added a lot of things in Post Production AE but either way it was nice to know how to work in organised layers in Maya and export different parts of an image which I didnt know you could actually do until this lesson. In the test version that I created and is shown here I think I did a rather good job of getting them all imported correctly and looking good while messing with a few of the settings to get it right, I understand that the render passes give the person using them more freedom to work with later on in the project as you can adjust each of the layers separately from one another. I will use this process later if I need to as it is the way professionally you are meant to work for the maximum amount of flexibility.


I heard a few names shouted out on a webinar I was watching the other day and decided to look into a few of the artists mentioned as they were mentioned to be Matte painting workers and this is one of the things I was going to look more into and work with but didnt get chance to or rather decided not to in the end. I also found a few useful tips and tricks when it comes to environment drawing from the website digitalartsecrets which I will use in the future.

Dylan Cole, Alp Altiner, Dusso

http://digitalartsecrets.com/


504 Cyborg Model Process

One of the last things I modelled this project was the Cyborg model, I left it a little late in the project so it got a little neglected but I still think it turned out okay for the amount of time it will actually be in shot in the video. I added new things that I have learned about like a glow map which really added to the piece and also got a little better at rigging as well as modelling in general which I did rather fast for this character. I like the colours and shapes of the model which I stuck to in reference to my concept art and reference images, I also think that I was efficient in mapping the model as I only mapped the parts of the model that would be in focus which is what practitioners use to save time because there is no point in beautifully rendering and creating everything especially when it is not going to be seen in the end result.


Also I have included a playblast so it is clearer on how I got to the finished result and what processes I went through to get there.


Some more reference images and walk cycle images that I used to get a more realistic walk cycle and to see what my rendered scene looks like finished.


This was a very new and interesting experience to me and very good practice because I tried something new that I didnt know would pay off but I think experience wise in the end it did, I did a little bit of research and thanks to Joel initially showing me this UV map I found that WoW creators Blizzard make their UV maps for their characters the opposite way around to what we have been taught here at Uni, instead of creating the model then UV mapping it and then painting over the UV map what I think that have done is to paint big parts of what the models UV map will look like onto a canvas and keeping it all in proportion and scale and then afterwards UV map the model with the texture already ready and just lining up the pieces. 

I think this method (when spent more time on) creates a more realistic finished result and is in some ways when working on a big image a lot faster, I tried this when creating my UV map and found that there were pros and cons to this way of working, it was harder to line up the UVs than before but was a lot faster of a work cycle because of the saved time when it comes to trying to find what part of the model matches up with what part of the exported UV map in PS because you are matching them up right there and then in your modelling software you cant really lose where you are in the map because you are lining it up as you go along.


I would use this method again when I come to UVing but the difference I would do would be to create a more diverse detailed UV map in PS before importing it to Maya to work with which will give me more freedom to match things up to where they should be.


Tuesday 5 March 2013

After Effects' Effects

These are just a few of the links I have been using to learn about different effects that I may want to use in my video in the future. I found the magical hits tutorial really interesting and watched it all the way through and was surprised to find out how the person who produced this video works and probably how they use these creative solutions in the industry, they used smoke effects and scale and pretty much all of the basic manipulation tools that I now know how to use in AE, this is encouraging because I feel that if I can produce something along the lines of almost good then with a little more practise and research into other creative industry methods I will be good enough to work in the industry when I finish this course and leave Uni.

http://www.videocopilot.net/tutorial/magical_hits/

http://www.youtube.com/watch?v=UFcx2gqQUMc

Sunday 3 March 2013

Maya Model Recordings

I have recently started recording my work processes when it comes to creating assets in maya and compositions in Photoshop, I think this is a good way to work as it makes you a little more conscious that people may not only see the end product of what you are creating but also your own personal work process. This has changed my work flow slightly and made me work faster which is for the better, I think it is well work a go if anyone can get their hands on some free recording software because I think that it also opens to opportunity of including some of your work flow in maybe a showreel and also show off workflows that do not usually get a lot of publicity on specific sites EG a photoshop picture will not get any attention on Youtube but the recording of you creating that picture on Youtube can be accessed in that way and will hopefully draw a little more attention from that source too.

Anyway here are two recordings I made while I blitzed through modelling my ship in one day (took about 3-4 hours) and while I created my ship interior over a few days (took about 7-8 hours).


This is a process that almost all individuals who have made it in the industry do, people like Nicholas Kay (Makes a living freelance and tutor lessons), Daarken (Has sold a book with his concept art it) and more, this is why I have branched out into recording my own work, maybe one day people will start asking me how I did this and I can look into offering tutorial lessons.